The Ultimate Guide to Building a Shed: Step-by-Step Shed Plans
The Ultimate Guide to Building a Shed: Step-by-Step Shed Plans
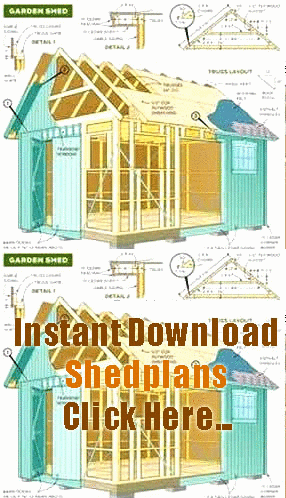
Are you in need of more storage space or a new workshop? Building a shed is a great solution. With the right set of plans and a little bit of skill, you can create a durable and practical structure that will meet your needs for years to come. In this ultimate guide, we will provide you with step-by-step shed plans and everything you need to know about building a shed.
Table of Contents:
- Step 1: Determine Your Shed Size Needs
- Step 2: Choose Your Shed Location
- Step 3: Select Your Shed Materials
- Step 4: Build Your Shed Foundation
- Step 5: Construct The Shed Floor
- Step 6: Build The Shed Walls
- Step 7: Add The Roof
- Step 8: Install Windows and Doors
- Step 9: Paint and Finish Your Shed
- Step 10: Move In Your Shed Contents
Step 1: Determine Your Shed Size Needs
Before starting to build your shed, you need to determine the size you need. Consider what items will be stored in there or on what activities you will undertake in your shed. Sheets of grid paper or a CAD program may assist you in creating a digital representation of the shed. This can assist you in making decisions about size ratios, position placement, and overall design. Keep in mind the building restrictions of your region and have permits necessary for the construction.
Step 2: Choose Your Shed Location
After deciding the size of your shed, you have to figure out where to build it. Keep in mind the building restrictions of your area for the size and type of shed allowed. You might also want to think about what the shed will be used for in order to locate it in the most convenient location for you. It is recommended to have your shed close to your house, but not too close.
Step 3: Select Your Shed Materials
Once you’ve determined your shed size and location, your next step is to select your shed materials. There are many shed materials available and choose the right one will depend on the intended purpose, budget and aesthetic look you desire. Some of the most commonly used materials in building a shed are wood, metal, plastic and vinyl.
Step 4: Build Your Shed Foundation
The foundation of any structure is essential to its longevity and stability. You must decide what kind of foundation is needed for your shed, but the most common are concrete, gravel and timber decking. A professional installation might be important if you live in an area with unstable soil or harsh weather and you may not have the expertise for a successful installation.
Step 5: Construct The Shed Floor
After the foundation has been installed, it’s time to build the shed floor. The floor must be strong enough to handle the weight of what will be stored in the shed. Use a ¾-inch thick plywood for the floorboards, or tongue and groove boards. Make sure you have a proper ventilation system is in place for your shed.
Step 6: Build The Shed Walls
Building the shed walls is a bit more complicated than building the floor. You must measure the wall-frame pieces carefully, cut them to size, and join them together at the corners. Place the nails securely and avoid overlapping the nails. If you’re having trouble with this, even the most basic woodworking book or online tutorial can help.
Step 7: Add The Roof
The roof is one of the most important parts of the shed as it will protect the interior and everything stored. Use high-quality materials such as shingles, sheets of metal or asphalt. This will allow for the appropriate protect from weather damage. Use weather resistant materials if applicable.
Step 8: Install Windows and Doors
Windows and doors are the next item for consideration in the step-by-step shed plan. Each window and door should fit flush to the surrounding frame and be sealed properly. Consider a design that mimics your existing house. Make sure the doors and windows align with your building codes as well.
Step 9: Paint and Finish Your Shed
Once the shed is built, it’s time to add a polish. A coat of paint or stain will ensure the materials for the shed are protected from the elements. Select an option that fits into the design of your home and landscape.
Step 10: Move In Your Shed Contents
Once the shed is painted and the finishing touches are done, it’s time to move things in. Proper shelving and organization to optimize the space within the shed is helpful in maintaining a neat and tidy space.
Now, you’re ready to build your own shed with these step-by-step shed plans. Remember to have fun, take your time, and be safe while you build. With these tips, you’ll be enjoying your brand new shed in no time at all. Good luck!
Related Searches
Keywords:
– building a shed
– step-by-step shed plans
– shed size
– shed location
– shed materials
– shed foundation
– shed floor
– shed walls
– shed roof
– windows and doors
– painting and finishing shed
– shed organization.
